QUICK SETUP


& START GUIDE

Lighting Tomorrow’s Potential

Pangea is the first intelligent lighting software that leverages the tremendous advancement of RF hardware technology over the last 6 years. While the technology may seem advanced, the setup is not.

In just 10 simple steps you can have your Pangea-equipped Rapidgrow fixtures operational.

Here at RapidGrow, our R&D team has run their hardware into the ground; internal alpha and beta tests, scaled deployments, security threat assessments, and the list goes on. We are putting our reputation out there for this technology because we proved that it works.

separator
RG_PANGEA_LOGOS-116px

Thank you for choosing RapidGrow LED products integrated with Pangea controls to meet your horticulture lighting needs.

Below is the Setup and Quick Start Guide. Feel free to reach out anytime, day or night, for all support or questions.

Pangea Support

​Phone: 310-512-6480 ext. 462
​19645 Rancho Way ​Rancho Dominguez, CA 90220

separator

PANGEA SETUP

SMART & SIMPLE

INSTALL RAPIDGROW CONTROLLED FIXTURES

SET UP THE CONTROLLER
APPLY INTEGRATIONS

CONTROL THE SYSTEM
separator

SETUP INSTRUCTIONS

Pangea Gateway Installation
  • null

    STEP 1

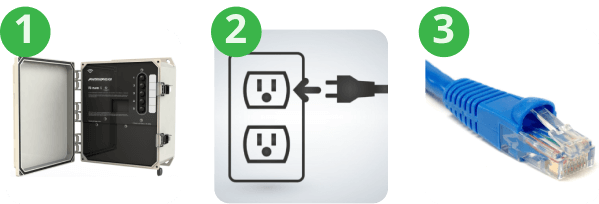
    Install and mount the Pangea Gateway in a central location of the area to be covered by the RF network. The number of gateways will depend on the area to be covered which should be determined prior to installation.

    Note: Please provide a picture of the gateway location once it has been installed for our reference purposes.

  • null

    STEP 2

    Connect a power cord and plug (if plugging into an outlet) to the Pangea Gateway. Connect/Plug the gateway to a constant 110-277 VAC power source.

    Service voltage 110-277V. Work MUST be carried out by qualified personnel ONLY.

  • null

    STEP 3

    Connect the PangeaLink Gateway to your internet router via CAT 6 / RJ45 Cable. The gateway will need an internet connection to connect to the PangeaLink cloud services.

  • null

    STEP 4

    Take a clear picture of the label that has the SNAP MAC, WIFI MAC, ETH MAC on the inside of the PangeaLink Gateway. Note: You should see it when you open the gateway door.

    Note: Save pictures to an easily accessible file or store on your phone. You will forward these images along with additional info in the final step.

  • null

    STEP 5

    Verify Gateway is powered on and connected to the Internet via Ethernet. When powered up there is a green light labeled LED1 that will be illuminated. The Ethernet light is on the Ethernet port which isn’t visible through the window. Once this step is completed, the Pangea team can begin the activation process.

    Customer will need to check (Power, Ethernet, and Firewall outbound ports) Ports that are needed with a fixed gateway IP address: * are minimum requirements

  • null

    STEP 6

    Provide a layout of the desired fixture/controller groupings and their location according to their physical placement at the site. Examples below:

    Written example:
    Flower Room 1: Fixture 1 = F1-1 / Fixture 2: F1-2 / Fixture 3: F1-3, etc…

    Flower Room 2: Fixture 1 = F2-1 / Fixture 2: F2-2 / Fixture 3: F2-3, etc…

    Veg Room 1: Fixture 1 = V1-1 / Fixture 2: V1-2 / Fixture 3: V1-3, etc…

    Mother Room 1: Fixture 1 = M1-1 / Fixture 2: M1-2 / Fixture 3: M1-3, etc…

  • null

    STEP 7

    A. This step should be completed during the fixture installment. Each fixture will come with label containing a 6-digit MAC ID; the ID will be used to mark and identify each fixture’s physical location (geotag fixtures). The image 7A shows what the MAC ID label looks like MAC ID is 175BCE in this case.

    B. Use these labels to mark your lighting layout. Note: Duplicate MAC ID stickers are provided for each fixture. Additional stickers can be used in conjunction with the lighting layout. You may also create a list that includes the fixture number, its dedicated MAC ID, and the zone in which it is located.

    Note: It is important to record the MAC address of each controller for future use. The original MAC address will be required in the event of a fixture replacement.

  • null

    STEP 8

    Provide a lighting run-time on/off schedule for each room. You can also request custom zones and dimming percentages (ramp-up/ramp-down). To avoid confusion between various light schedules, it is recommended to specify in the event(schedule) title what zone/area/light section is being shut on or off.

  • null

    STEP 9

    Email fixture Gateway pictures from Step 4 and fixture label guide from Step 6 & 7, and include a technical POC and their contact information (name, phone number, and email address) to the below address: pangeasupport@rapidgrowled.com

  • null

    STEP 10

    Once the Pangea team receives the required info listed above, they will reach out to the POC provided. The activation/commissioning process will begin upon completion of the installation of the gateway(s) and controls. After activating, we will be ready pull in lights (controls) into the system and begin the zoning and mapping process.


    The amount of time it takes to map lights varies depending on how many nodes/fixtures are in your system. Once available, our team will reach out with an estimated time of completion.